Genie Model IS550: A Comprehensive Manual Overview
This manual details the Genie IS550 opener‚ offering a step-by-step guide for installation‚ operation‚ and maintenance․ Explore features‚ troubleshoot issues‚ and understand warranty details․
The Genie IS550 represents a significant advancement in garage door opener technology‚ designed for reliability and user-friendly operation․ This manual serves as a comprehensive resource for installers‚ operators‚ and maintenance personnel․ It details everything from initial setup and control functionality to advanced settings and troubleshooting procedures․ Understanding the IS550’s capabilities ensures optimal performance and longevity․
Project Genie integration offers streamlined access and control‚ while compatibility checks are crucial before installation – ensuring seamless operation with your existing system․ This guide emphasizes safety precautions and provides clear instructions for navigating the control panel and remote functionalities․ Regular maintenance‚ as outlined within‚ will maximize the lifespan of your Genie IS550‚ preventing potential issues and ensuring continued smooth operation․
Key Features and Benefits
The Genie IS550 boasts several key features enhancing convenience and security․ Project Genie compatibility allows for innovative control options‚ while robust security settings provide access control․ Its design prioritizes smooth‚ quiet operation‚ minimizing disruption․ The IS550 offers adjustable travel limits and force settings‚ customizable to your specific garage door requirements․
Benefits include increased home security‚ simplified operation via the control panel and remote‚ and reduced manual effort․ Regular maintenance‚ detailed in this manual‚ extends the product’s lifespan․ Chrome browser compatibility ensures easy access to support resources and updates․ The IS550’s reliable performance and user-friendly design make it a superior choice for modern homeowners seeking a dependable garage door solution․

Installation Guide
Proper installation is crucial for optimal performance․ This section provides detailed instructions for unboxing‚ mounting‚ wiring‚ and initial configuration of your Genie IS550․
Unboxing and Component Check
Carefully unpack the Genie IS550 package and verify all components are present․ The box should contain the opener unit‚ a remote control‚ a safety sensor‚ mounting hardware (brackets‚ bolts‚ nuts)‚ a user manual‚ and potentially a chain or belt drive depending on the model․ Inspect each item for any shipping damage – dents‚ scratches‚ or broken parts․
Compare the received components against the parts list detailed within this manual․ If anything is missing or damaged‚ immediately contact the retailer or Genie customer support․ Do not attempt installation with incomplete or damaged parts․ Retain the original packaging for potential returns or warranty claims․ A thorough component check ensures a smooth and safe installation process‚ preventing delays and potential issues later on․
Mounting the Genie IS550
Securely mounting the Genie IS550 is crucial for safe and reliable operation․ Begin by selecting appropriate mounting location within your garage‚ ensuring sufficient headroom and structural support․ Utilize the provided mounting brackets and hardware‚ attaching them firmly to ceiling joists or a solid concrete surface․
Carefully align the opener unit with the brackets‚ ensuring it’s level and stable․ Double-check all bolts and nuts are tightened to the manufacturer’s specifications․ Improper mounting can lead to vibrations‚ noise‚ and potential failure․ Refer to the detailed diagrams in this manual for precise bracket placement and fastening instructions․ Prioritize safety – if unsure‚ consult a qualified professional for assistance․
Wiring and Electrical Connections
Electrical connections for the Genie IS550 must be performed with utmost care and adherence to local electrical codes․ Before commencing‚ always disconnect power at the circuit breaker․ Identify the correct wiring terminals on the opener unit and your garage’s electrical system․ Typically‚ this involves a standard 120V AC power supply․
Connect the wires securely‚ matching colors (black to black‚ white to white‚ and green/bare copper to ground)․ Ensure connections are tight to prevent arcing or short circuits․ Double-check all wiring before restoring power․ Incorrect wiring can damage the opener or create a fire hazard․ If you are uncomfortable with electrical work‚ consult a qualified electrician for safe installation․
Initial Setup and Configuration
After wiring‚ the Genie IS550 requires initial setup for optimal performance․ Begin by restoring power at the circuit breaker․ The opener will likely enter a learning mode‚ indicated by flashing lights․ Program the travel limits – up and down – to match your garage door’s full range of motion․ This prevents over-travel and potential damage․
Next‚ configure the force settings‚ adjusting the opener’s sensitivity to resistance․ Proper force settings ensure the door reverses safely if obstructed․ Finally‚ pair the remote controls following the manufacturer’s instructions․ Test the operation thoroughly‚ verifying smooth and safe movement․ Refer to the control panel for detailed configuration options․

Operation and Control
The Genie IS550 offers versatile control options‚ including a user-friendly control panel‚ remote functionality‚ and manual operation for convenient garage door management․
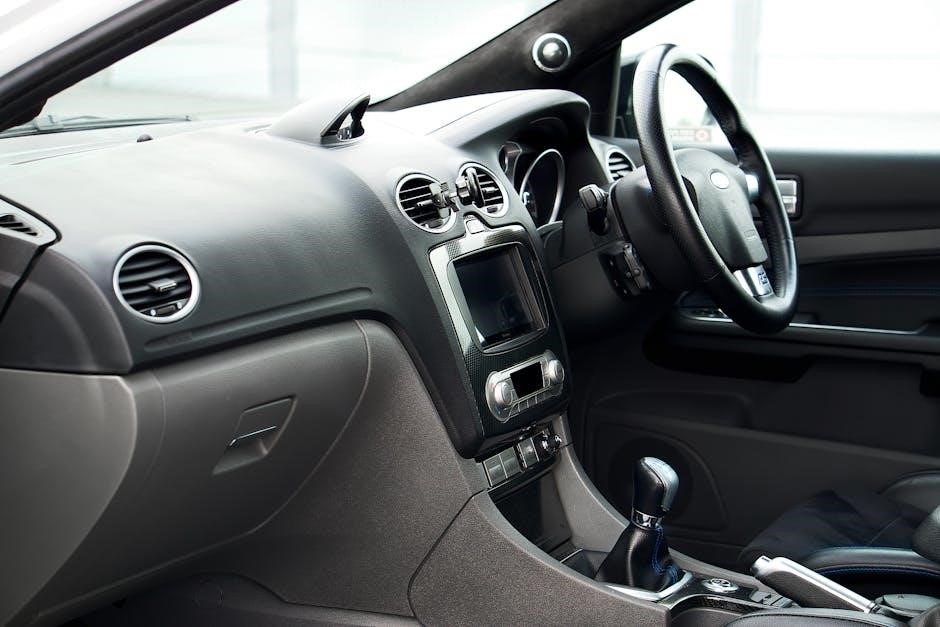
Understanding the Control Panel
The Genie IS550’s control panel serves as the central hub for managing your garage door opener․ It typically features an intuitive layout with buttons for opening‚ closing‚ and stopping the door’s operation․ A prominent display often indicates the door’s current status – open‚ closed‚ or stopping – providing immediate feedback․
Additional buttons may include a ‘vacation lock’ feature‚ enhancing security during extended absences‚ and a ‘light’ control for adjusting the integrated garage lighting․ Some models incorporate smart home connectivity indicators‚ displaying Wi-Fi status․ Understanding the LED indicators is crucial; flashing lights often signal errors or specific operational modes․ Refer to the troubleshooting section for detailed interpretations of these signals․ Familiarize yourself with the panel’s functions to ensure smooth and safe operation of your Genie IS550․
Remote Control Functionality
The Genie IS550 utilizes multi-frequency remote controls for secure and reliable operation․ These remotes typically feature multiple buttons‚ allowing control of several garage doors or accessories․ Programming a new remote is straightforward‚ usually involving pressing a ‘learn’ button on the motor unit and then a button on the remote itself․
Ensure the remote has fresh batteries for optimal range and performance․ Some models support smart device integration‚ enabling control via smartphone apps․ The remote’s range can be affected by obstructions or interference․ If experiencing issues‚ try repositioning the antenna or replacing the batteries․ Always keep remotes secure to prevent unauthorized access․ Refer to the troubleshooting section for remote pairing and functionality concerns․
Manual Operation Procedures
In the event of power failure or remote malfunction‚ the Genie IS550 can be operated manually․ Locate the manual release cord‚ typically hanging from the trolley․ Pulling this cord disengages the door from the opener‚ allowing for manual lifting and lowering․ Exercise caution‚ as the door may be heavy․
Always re-engage the opener after manual operation․ Push the trolley carriage back until it clicks into place‚ then gently test the operation with the remote or wall button․ Never force the mechanism․ Regular practice of manual operation ensures familiarity during emergencies․ Disconnecting the opener prevents accidental operation during maintenance․ Consult the safety features section for important precautions regarding manual release․
Safety Features and Precautions
The Genie IS550 incorporates several safety features to prevent accidents and ensure user well-being․ These include obstruction detection‚ which stops and reverses the door if an obstacle is encountered during closing․ Photo-eye sensors create an invisible beam; if broken‚ the door will not descend․ Regularly test these sensors for proper function․
Never allow children to operate the opener or play near the door․ Avoid standing directly in the door’s path during operation․ Always ensure the area is clear before activating the opener․ Disconnect power before performing any maintenance․ Familiarize yourself with the manual release procedure for emergencies․ Adhering to these precautions minimizes risks and maximizes safety․

Troubleshooting
This section provides solutions for common issues‚ explains error codes‚ and guides you through resetting the Genie IS550 for optimal performance․
Common Issues and Solutions
Problem: The Genie IS550 isn’t responding to the remote․ Solution: Check the remote’s batteries and ensure they are correctly installed․ Verify the remote is programmed to the unit; re-programming may be necessary․ Interference from other devices can also cause issues – try relocating the antenna․
Problem: The door opens partially then stops․ Solution: Adjust the travel limits (see Advanced Settings)․ Obstructions in the door’s path can trigger safety sensors; inspect the area for anything blocking the sensors’ beams․ Check for binding in the door’s tracks or springs․
Problem: The motor runs‚ but the door doesn’t move․ Solution: Disconnect the opener and manually operate the door to check for resistance․ A broken spring or damaged cable could be the cause․ Contact a qualified technician for repairs․
Problem: Error codes are displayed․ Solution: Refer to the “Error Codes and Their Meanings” section for specific troubleshooting steps related to the displayed code;
Error Codes and Their Meanings
Code 1 – Safety Sensor Issue: Indicates a problem with the safety sensors․ Verify sensors are aligned‚ clean‚ and free from obstructions․ Check wiring connections to the logic board․

Code 2 – Travel Limit Switch: Suggests a faulty travel limit switch․ Adjust travel limits or replace the affected switch․ Ensure proper adjustment to prevent over-travel․
Code 3 – Motor Overheat: The motor has overheated and shut down․ Allow the motor to cool for 30 minutes before attempting operation․ Check for obstructions causing excessive strain․
Code 4 – Logic Board Error: Indicates a problem with the control board․ Reset the unit or contact a qualified technician for board replacement․ This often requires professional diagnosis․
Code 5 – Remote Signal Interference: Interference is preventing proper remote communication․ Reprogram remotes and check for nearby devices causing signal disruption․
Resetting the Genie IS550
Soft Reset: Disconnect power to the Genie IS550 for 30 seconds․ Reconnect power; this often resolves minor glitches and restores default settings without erasing learned remotes․
Factory Reset (Advanced): Locate the ‘Learn’ or ‘Reset’ button on the logic board (refer to the parts diagram)․ Press and hold for 10-15 seconds while power is connected․ Caution: This erases all remote codes and programmed settings‚ requiring complete reprogramming․
Remote Reprogramming: After a factory reset‚ reprogram each remote using the ‘Learn’ button on the motor unit․ Follow the specific instructions in the remote control section of this manual․
Important Note: A factory reset should only be performed if a soft reset fails to resolve persistent operational issues․ Always consult a qualified technician if unsure․

Maintenance and Care
Regular inspections‚ lubrication of moving parts‚ and prompt parts replacement ensure optimal Genie IS550 performance and longevity‚ maximizing operational safety․
Regular Inspection Checklist
To maintain peak performance and safety of your Genie IS550‚ implement a routine inspection schedule․ Begin by visually examining the entire unit for any signs of damage‚ including cracks‚ corrosion‚ or loose components․ Carefully inspect all wiring connections‚ ensuring they are secure and free from fraying or exposed wires․
Check the travel limits‚ verifying they are accurately set and functioning correctly to prevent over-travel․ Lubricate the chain or belt drive regularly‚ using a manufacturer-approved lubricant‚ to reduce friction and noise․ Inspect the safety sensors – photo eyes – ensuring they are clean‚ aligned‚ and unobstructed for proper operation․ Finally‚ test the manual release mechanism to confirm it functions smoothly in case of power outages․ Document all inspections and maintenance performed․
Lubrication and Cleaning
Proper lubrication and cleaning are crucial for extending the lifespan and ensuring smooth operation of your Genie IS550․ Regularly apply a silicone-based lubricant to the chain or belt drive‚ avoiding oil-based products which can attract dust and grime․ Focus on rollers and moving parts‚ ensuring even distribution․
Clean the operator’s exterior with a mild detergent and damp cloth‚ avoiding harsh chemicals or abrasive cleaners․ Pay attention to the photo eyes‚ gently wiping them to remove any dust or debris that could interfere with their function․ Inspect and clean the track system‚ removing any obstructions․ Avoid getting water inside the motor unit․ Consistent cleaning prevents buildup and maintains optimal performance․
Parts Replacement Guide
Replacing worn or damaged parts is essential for maintaining the Genie IS550’s functionality and safety․ Always disconnect power before attempting any repairs․ Common replacement parts include the chain/belt‚ rollers‚ springs‚ and photo eyes․ Refer to the parts diagram in this manual for accurate identification․
When replacing the chain or belt‚ ensure proper tensioning․ Springs should be replaced in pairs to maintain balance․ Photo eyes require precise alignment after installation․ If unsure‚ consult a qualified technician․ Use only genuine Genie replacement parts to guarantee compatibility and performance․ Improper installation can lead to malfunctions or safety hazards․ Document all replacements for warranty purposes․

Advanced Settings
Customize your Genie IS550 with adjustable travel limits‚ force settings‚ and enhanced security features for optimal performance and personalized control․
Adjusting Travel Limits
Precisely defining the Genie IS550’s travel limits ensures optimal door operation and prevents unintended collisions․ Access the limit adjustment settings via the control panel‚ typically found under the ‘Advanced’ or ‘Settings’ menu․ Carefully observe the door’s movement during adjustment; small increments are recommended․
Begin by loosening the limit adjustment screws‚ usually marked ‘Up’ and ‘Down’․ Use the adjustment tool to incrementally turn the screws‚ observing the door’s travel․ Clockwise adjustments generally decrease travel‚ while counter-clockwise increases it․ Test the limits after each adjustment to confirm desired operation․
Important: Avoid excessive adjustments‚ as this can strain the motor or compromise safety features․ Refer to the detailed diagrams within this manual for screw locations and recommended adjustment ranges․ Always prioritize safety and double-check settings before finalizing adjustments․
Force Settings Configuration
The Genie IS550’s force settings dictate the motor’s power applied during door operation‚ crucial for overcoming resistance and ensuring smooth movement․ Access these settings through the control panel’s ‘Advanced’ menu‚ typically labeled ‘Force Adjustment’ or similar․ Adjusting these requires caution and understanding․
Separate ‘Up’ and ‘Down’ force settings allow tailored control․ Increasing force assists with heavier doors or those encountering significant friction‚ but excessive force can compromise safety․ Begin with minimal adjustments‚ testing after each increment․ Observe the door’s response to identify optimal settings․
Caution: Never exceed the manufacturer’s recommended force limits․ Incorrect settings can lead to damage or injury․ Regularly review these settings‚ especially after door maintenance or modifications․ Consult the detailed diagrams in this manual for precise locations and recommended ranges․
Security Settings and Access Control
The Genie IS550 prioritizes security‚ offering features to restrict unauthorized access and protect your property․ Access control is managed through rolling code technology‚ preventing code duplication․ Regularly reprogram remote controls to enhance security‚ especially after losing one․
The control panel allows for setting access schedules‚ limiting operation to specific times․ Utilize the ‘Vacation Mode’ to disable remote access during extended absences․ Consider enabling the ‘Lock’ function‚ requiring a PIN for operation․
Important: Never share your PIN or remote codes․ Regularly check for firmware updates‚ as these often include security enhancements․ Review the manual’s section on ‘Security Best Practices’ for comprehensive guidance․ Ensure all users understand proper operation and security protocols․

Technical Specifications
The IS550 boasts detailed specifications including dimensions‚ weight‚ power requirements‚ and operating temperature ranges․ Refer to the chart for precise technical data․
Dimensions and Weight
Understanding the physical characteristics of the Genie IS550 is crucial for proper installation and ensuring compatibility with your garage space․ The unit’s overall dimensions are carefully engineered to maximize functionality while minimizing intrusion into the garage․ Specifically‚ the main power unit measures approximately 11․2 inches in height‚ 15․3 inches in width‚ and 7․4 inches in depth․
These measurements are vital when assessing clearance for mounting and ensuring sufficient headroom for door operation․ The total weight of the Genie IS550‚ including all standard components‚ is around 30 pounds․ This weight is a key consideration for installers‚ dictating the appropriate mounting hardware and support structures needed to guarantee a secure and stable installation․ Accurate weight and dimension knowledge prevents installation issues․
Power Requirements
The Genie IS550 garage door opener operates on a standard 120-volt AC power supply‚ commonly found in most residential settings․ It’s essential to verify that your garage has a properly grounded outlet capable of delivering the required amperage to prevent electrical hazards and ensure optimal performance․ The opener typically draws approximately 2․0 amps at peak operation‚ though standby power consumption is significantly lower․
A dedicated 15-amp circuit is highly recommended for the Genie IS550 to avoid overloading the electrical system‚ especially if other appliances share the same circuit․ Using an extension cord is strongly discouraged‚ as it can lead to voltage drops and potential damage to the opener’s motor․ Always consult a qualified electrician if you have any concerns about your garage’s electrical setup․
Operating Temperature Range
The Genie IS550 garage door opener is designed for reliable operation within a specified temperature range‚ ensuring consistent performance across various climates․ Ideally‚ the opener functions optimally between 32°F (0°C) and 122°F (50°C)․ Operating outside this range may lead to reduced performance‚ such as slower door speeds or increased motor strain․
Exposure to extreme cold can thicken lubricating greases‚ hindering smooth operation‚ while excessive heat can cause components to overheat․ For regions experiencing temperatures outside the recommended range‚ consider insulating the opener unit or providing additional ventilation․ Consistent performance is best achieved within the specified temperature guidelines‚ maximizing the lifespan and efficiency of your Genie IS550․
Legal Terms and Warranty Information
Review the Genie IS550’s warranty coverage‚ disclaimer‚ and liability details carefully before use․ Understand your rights and responsibilities as a product owner․
Warranty Coverage Details
The Genie IS550 opener is covered by a limited warranty‚ protecting against defects in materials and workmanship․ This warranty typically begins on the date of original purchase‚ and the duration varies depending on the component․ The motor assembly generally receives the longest coverage period‚ often spanning several years․ Other parts‚ like electronic components and hardware‚ may have shorter warranty terms․

This warranty does not cover damage resulting from improper installation‚ misuse‚ accidents‚ or unauthorized modifications․ Regular maintenance‚ as outlined in this manual‚ is crucial for maintaining warranty validity․ Proof of purchase is required for all warranty claims․ To initiate a claim‚ contact Genie customer support‚ providing details of the issue and your purchase information․ Warranty service is typically performed by authorized Genie service centers․
Genie assumes no liability for damages arising from improper installation‚ operation‚ or maintenance of the IS550 opener․ This includes‚ but is not limited to‚ property damage‚ personal injury‚ or consequential losses․ Users are solely responsible for ensuring the installation complies with all local codes and regulations‚ and is performed by qualified personnel․
This manual provides guidance‚ but does not substitute for professional expertise․ Genie disclaims any implied warranties‚ including merchantability and fitness for a particular purpose․ Modifications to the product void any remaining warranty and may compromise safety․ Always prioritize safety precautions outlined within this manual․ Genie’s liability is limited to the repair or replacement of defective parts‚ as determined by warranty coverage․