Carrier Infinity Thermostat Installation: A Comprehensive Guide
This guide details a DIY project for installing a Carrier Infinity Thermostat, offering preparation and instructions for a smooth process. It maximizes thermostat capabilities.
Understanding the Infinity System
The Carrier Infinity system represents a leap forward in home comfort technology, integrating seamlessly with your HVAC equipment for optimal performance and efficiency. It’s more than just a thermostat; it’s a comprehensive control system designed to manage temperature, humidity, and air quality with precision.
At its core, the Infinity system utilizes advanced algorithms and smart sensors to learn your home’s heating and cooling patterns. This allows for predictive adjustments, ensuring consistent comfort while minimizing energy consumption. The system’s capabilities extend beyond basic temperature control, offering features like zoning, remote access, and integration with other smart home devices.
Understanding the system’s architecture is crucial for a successful installation. The Infinity Touch Control serves as the user interface, while the system controller manages the complex interactions between the thermostat, sensors, and HVAC equipment. Proper installation and commissioning are vital to unlock the full potential of this sophisticated system, ensuring years of reliable and efficient operation.
Thermostat Compatibility & Model Overview
Carrier Infinity thermostats aren’t universally compatible; ensuring the correct model for your HVAC system is paramount. The Infinity system supports various thermostat models, including touchscreen and non-touchscreen options, each offering a slightly different feature set. Common models include the SYSTXCCUID01-B and newer iterations with enhanced connectivity.
Compatibility hinges on your existing HVAC equipment. The Infinity system is designed to work with Carrier’s high-efficiency furnaces and air conditioners, leveraging their variable-speed capabilities. Confirming your system’s compatibility before purchasing a thermostat prevents frustrating issues post-installation.
Model overviews reveal key differences. Touchscreen models offer a more intuitive user experience, while simpler models prioritize functionality. Consider features like smart sensor integration, remote access via the Carrier app, and zoning capabilities when selecting a model. Refer to Carrier’s official documentation or a qualified HVAC technician to verify compatibility and choose the ideal thermostat for your needs.
Tools and Materials Required
Successful Carrier Infinity thermostat installation demands specific tools and materials. A screwdriver set (Phillips and flathead) is essential for removing the old thermostat and securing the new one. Wire strippers/cutters are crucial for preparing the existing wiring for connection to the new terminal block.
A level ensures the thermostat is mounted straight, enhancing its appearance and functionality. A voltage tester verifies power is safely shut off before working with wires. You’ll also need appropriately sized wire connectors (wire nuts) to join wires if necessary. Ordinary thermostat wire is recommended for replacements.
Beyond tools, gather materials like the Carrier Infinity thermostat itself, a mounting plate (usually included), screws and anchors for wall mounting, and potentially a C-wire adapter if your system lacks a common wire. Labeling tape helps identify wires during disconnection and reconnection. Finally, have the installation manual readily available for reference throughout the process.
Pre-Installation Checklist
Before starting, ensure safety by shutting off power to the HVAC equipment. Verify system compatibility and carefully identify existing wiring for a seamless transition.
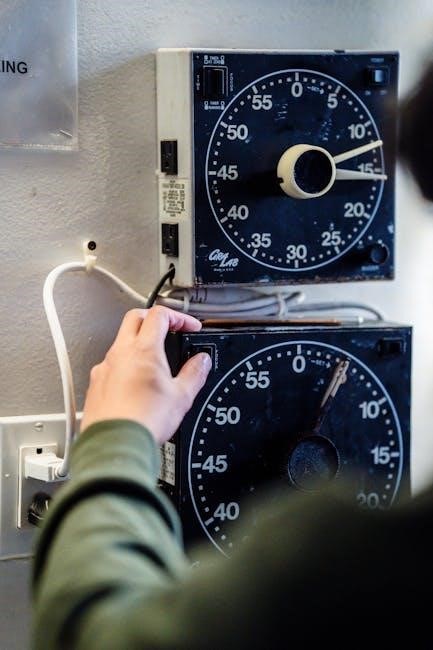
Safety Precautions: Power Shut-Off
Prioritizing safety is paramount during the Carrier Infinity Thermostat installation. Always turn off all power to the HVAC equipment at the breaker panel before commencing any work. This crucial step prevents electrical shock and potential damage to the system. Double-check that the power is completely off using a non-contact voltage tester at the thermostat wires.
Failure to disconnect power can result in serious injury or equipment malfunction. Confirm the breaker is switched to the “off” position and consider placing a warning sign on the breaker panel to alert others. Remember, even after switching off the breaker, residual voltage might be present, hence the importance of the voltage tester;
This precaution isn’t merely a suggestion; it’s a fundamental safety requirement. Proceed with the installation only after verifying a complete power shut-off. Your safety, and the integrity of your HVAC system, depend on it.

Identifying Existing Wiring
Before disconnecting the old thermostat, carefully document the existing wiring configuration. This is a critical step to ensure correct connections with the new Carrier Infinity Thermostat. Take clear, high-resolution photographs of the wiring connections at the old thermostat’s terminal block.
Label each wire with its corresponding terminal designation (e.g., R, W, Y, G, C). If wires are not labeled, use masking tape and a permanent marker. Note the wire colors and their connections. Disconnect the wires one at a time, referencing your photos and labels to avoid confusion.
Pay close attention to the presence of a C-wire (Common wire), which is often blue and essential for powering the Infinity thermostat. Understanding the existing wiring scheme will significantly simplify the installation process and prevent errors. Accurate documentation is key to a successful installation.
Checking HVAC System Compatibility
Ensuring compatibility is paramount before installing a Carrier Infinity Thermostat. The Infinity system is designed to work with specific Carrier HVAC equipment. Verify your existing furnace and air conditioner are compatible with the Infinity control system. Refer to the Carrier Infinity System Installation Instructions for detailed compatibility charts.
Confirm your HVAC system supports the features offered by the Infinity thermostat, such as variable-speed operation and zoning. Incompatible systems may experience limited functionality or operational issues. The Infinity system covers setup, operation, and troubleshooting at a high level, but detailed equipment instructions are separate.
If you are unsure about compatibility, consult a qualified HVAC technician. Incorrect installation on an incompatible system can damage your equipment and void warranties. Proper system assessment prevents future problems and ensures optimal performance.

Wiring the Infinity Thermostat
Proper wiring is crucial for a functional installation. This section details understanding the terminal block, diagrams for common systems, and connecting the essential C-wire.
Understanding the Terminal Block
The Infinity thermostat’s terminal block is the central connection point for your HVAC system’s wiring. It’s vital to correctly identify each terminal before making any connections to ensure proper system operation. Terminals are typically labeled with letters corresponding to specific functions – R (power), C (common), Y (cooling), G (fan), W (heating), and others depending on your system configuration.
Carefully examine the wiring diagram included with your thermostat and compare it to the existing wiring at your old thermostat. Note the color of each wire and its corresponding terminal. The C-wire, or common wire, is particularly important as it provides continuous power to the thermostat. If a C-wire isn’t present, you may need to install one – a process detailed later in this guide.
Always double-check your connections before proceeding. Incorrect wiring can damage your thermostat or HVAC equipment. Refer to the Carrier Infinity Control installation instructions manual for detailed diagrams and explanations of each terminal function. Understanding these connections is fundamental to a successful installation.
Wiring Diagrams for Common HVAC Systems
Carrier Infinity thermostats accommodate various HVAC configurations, but proper wiring is crucial for each. Common systems include conventional heating and cooling, heat pumps, and dual-fuel setups. The installation manual provides specific wiring diagrams tailored to these systems, illustrating the correct terminal connections for each wire.
For conventional systems, you’ll typically connect R to power, Y to cooling, G to the fan, and W to heating. Heat pump systems require different wiring, often utilizing the O/B terminal for reversing valve control. Dual-fuel systems combine both gas and electric heating, necessitating connections for both heat sources.
Always consult the diagram corresponding to your specific HVAC system. Incorrect wiring can lead to malfunctions or damage. The manual emphasizes matching wire colors to terminal labels and verifying connections before powering on the system. Detailed illustrations simplify the process, ensuring accurate and safe installation.
Connecting the C-Wire (Common Wire)
The C-wire, or common wire, is often essential for Carrier Infinity thermostat operation, providing continuous power. Many older systems lack a C-wire, requiring adaptation. The installation manual details several solutions, including utilizing an existing unused wire or installing a C-wire adapter.
If an unused wire exists, it can be connected to the C terminal on both the thermostat and the furnace control board. If no unused wire is available, a C-wire adapter draws power from other wires, effectively creating a common connection. These adapters require careful installation following the manual’s instructions.
Proper C-wire connection ensures stable thermostat performance and prevents issues like flickering displays or intermittent operation. The manual stresses verifying the C-wire connection with a multimeter before proceeding. Incorrect installation can damage the thermostat or HVAC system, so meticulous attention to detail is vital.
Handling Wire Length Limitations (Over 25ft)
The Carrier Infinity thermostat installation manual addresses wire length limitations, specifically noting issues with continuous wire runs exceeding 25 feet. Longer wire lengths can introduce voltage drop, potentially causing communication errors or unreliable system operation. The manual recommends specific wiring practices to mitigate these risks.
For runs over 25 feet, using a heavier gauge wire (typically 18 AWG instead of 20 AWG) is strongly advised to minimize voltage drop. Additionally, avoiding sharp bends and ensuring secure connections at both the thermostat and furnace control board are crucial. The manual may suggest using a dedicated power supply for the thermostat in extreme cases.
Proper wire management and adherence to the manual’s guidelines are essential for maintaining system stability. Ignoring these limitations can lead to troubleshooting headaches and potentially require professional assistance. Careful planning and execution during wiring are key to a successful installation.

Mounting the Thermostat
Select the appropriate mounting configuration, remove the old thermostat, attach the mounting plate, and carefully connect the wires for a secure installation.
Selecting Mounting Configuration
Before physically mounting your Carrier Infinity thermostat, carefully consider the optimal configuration for your wall and existing wiring setup. The installation manual details various mounting options to accommodate different scenarios. Assess the location of your previous thermostat and identify any potential obstructions, such as furniture or wall features, that might interfere with the new unit’s placement.
Ensure the chosen location is level and provides adequate space around the thermostat for easy access and visibility. The mounting plate is designed to be adaptable, allowing for both flush and slightly recessed installations. Review the diagrams in the manual to understand how the plate aligns with the wall surface.
Consider wire routing when selecting the configuration. You want to minimize visible wiring and ensure the wires aren’t strained or pinched during installation. Proper planning at this stage will contribute to a clean, professional-looking installation and prevent future issues. Take your time and double-check your chosen configuration before proceeding to remove the old thermostat.
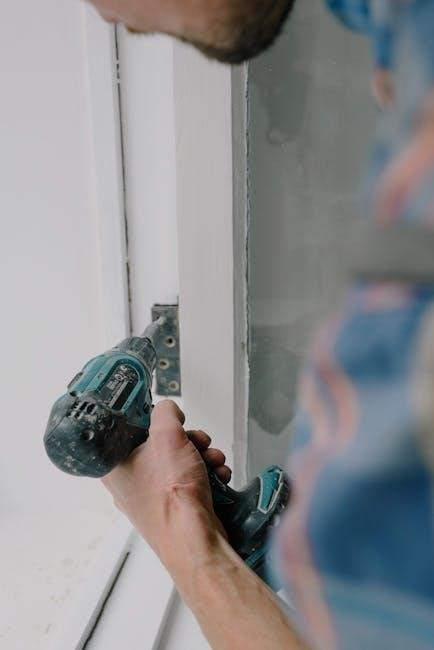
Removing the Old Thermostat
Prior to any wiring changes, safely remove your existing thermostat. Crucially, ensure all power to the HVAC equipment is completely shut off at the breaker box – this is a vital safety precaution. Once confirmed, carefully detach the thermostat cover, exposing the wiring connections. Before disconnecting any wires, take a clear photograph of the existing wiring configuration. This photo will serve as an invaluable reference during the installation of your Carrier Infinity thermostat.
Gently disconnect each wire from the old thermostat’s terminal block, labeling each wire as you remove it. Use the labels to correspond with the terminal designations on your old unit. Avoid letting any wires fall back into the wall. Once all wires are disconnected, carefully remove the old thermostat’s mounting plate from the wall. Discard or recycle the old thermostat responsibly.
Attaching the Mounting Plate
With the old thermostat removed, prepare for mounting the new Carrier Infinity thermostat. Select the appropriate mounting configuration based on your wall type and wiring setup. Position the new mounting plate on the wall, ensuring it covers the existing hole left by the previous thermostat. Use a level to guarantee the plate is perfectly straight – a level installation is crucial for a professional appearance and proper functionality.
Mark the screw hole locations on the wall using a pencil. Drill pilot holes at the marked locations if necessary, especially for hard surfaces like plaster or tile. Secure the mounting plate to the wall using the provided screws. Ensure the plate is firmly attached and doesn’t wobble. Double-check that the mounting plate is level before proceeding to the next step – connecting the wires.
Connecting the Wires to the Thermostat
Now, carefully connect the wires to the corresponding terminals on the Infinity thermostat’s mounting plate. Refer to the wiring diagram you identified during the pre-installation phase – accurate connections are vital for proper system operation. Gently strip the ends of the wires if needed, exposing about ¼ inch of bare wire. Insert each wire firmly into the correct terminal, ensuring a secure connection.
Double-check each connection against the wiring diagram before proceeding. A loose or incorrect connection can cause system malfunctions. Once all wires are connected, gently push any excess wire back into the wall opening. Carefully align the thermostat body with the mounting plate and snap it into place. Ensure it clicks securely, indicating a proper fit. Avoid forcing it, as this could damage the thermostat or the wiring.

System Commissioning & Setup
Initial power-up triggers screen prompts, and the Infinity System offers automated commissioning features to simplify setup. Configure system settings for optimal performance.
Initial Power-Up and Screen Prompts
Upon restoring power to the HVAC system after installation, the Carrier Infinity thermostat initiates a startup sequence designed to guide the user through essential configuration steps. The initial screen prompts are a crucial part of the automated commissioning process, simplifying what could otherwise be a complex setup.
These prompts typically begin with language selection and date/time settings. Subsequently, the thermostat will guide you through identifying the system type – whether it’s a furnace, heat pump, or air conditioner – and its fuel source. The system intelligently detects certain parameters, but user confirmation is often required.
Pay close attention to each prompt, as accurate responses are vital for proper system operation. The thermostat may also ask about zoning configurations, if applicable. Following these prompts ensures the Infinity system is correctly tailored to your specific HVAC setup, maximizing efficiency and comfort. Detailed instructions are available within the thermostat’s interface and the full installation manual.
Automated Commissioning Features
The Carrier Infinity system boasts advanced automated commissioning features designed to streamline the setup process post-installation. These features significantly reduce the complexity of configuring a sophisticated HVAC system, minimizing the need for extensive manual adjustments. The system intelligently tests and verifies various components, ensuring optimal performance from the outset.
Key features include automatic detection of equipment types, such as furnaces and heat pumps, and self-calibration routines that optimize airflow and temperature control. The thermostat performs a series of diagnostic checks, identifying potential issues and prompting the installer to address them. This proactive approach helps prevent operational problems down the line.
Furthermore, the automated commissioning process simplifies zoning configuration and ensures proper communication between the thermostat and the HVAC equipment. These features, detailed in the installation instructions, contribute to a more efficient and reliable heating and cooling experience, maximizing energy savings and comfort.
Configuring System Settings
After the automated commissioning is complete, fine-tuning the system settings is crucial for personalized comfort and optimal efficiency. The Carrier Infinity thermostat offers a comprehensive menu of configurable options accessible through its intuitive touchscreen interface. Users can adjust temperature setpoints, fan speeds, and scheduling preferences to match their lifestyle.
Essential settings include defining heating and cooling schedules, setting temperature setbacks for energy savings, and configuring humidity control parameters. The thermostat allows for customized programming for different days of the week and even specific times of day. Zoning configurations, if applicable, can also be refined to ensure consistent temperatures throughout the home.
Detailed instructions within the installation manual guide users through each setting, explaining its function and impact on system performance. Proper configuration ensures the Infinity system operates precisely as intended, delivering maximum comfort and minimizing energy consumption. Regular review and adjustment of these settings can further optimize performance.

Advanced Features & Troubleshooting
Explore smart sensor integration, resolve common issues, and decode error codes for optimal performance. The manual provides detailed guidance for a seamless experience.
Smart Sensor Integration Instructions
Integrating smart sensors with your Carrier Infinity Thermostat unlocks enhanced comfort and efficiency features. These sensors monitor temperature and humidity in various zones, allowing for personalized climate control throughout your home. Begin by ensuring your Infinity system supports smart sensor connectivity – consult your system’s documentation for compatibility.
During installation, strategically place sensors away from direct sunlight, drafts, and heat sources for accurate readings. The thermostat will guide you through the pairing process, typically involving a simple menu navigation on the touchscreen. Each sensor requires unique identification within the system.
Once paired, you can assign sensors to specific rooms or zones, customizing temperature preferences for each area. The Infinity system learns occupancy patterns, optimizing energy usage based on where people are present. Refer to the detailed instructions within the installation manual for specific sensor models and advanced configuration options. Proper sensor placement and configuration are crucial for maximizing the benefits of this advanced feature.
Troubleshooting Common Installation Issues
Encountering issues during Carrier Infinity thermostat installation is common. A frequent problem is incorrect wiring; double-check all connections against the wiring diagrams, paying close attention to the C-wire (common wire) which is often a source of errors. If the thermostat doesn’t power on, verify the breaker is fully engaged and the power supply is adequate.

Communication failures between the thermostat and HVAC system can occur. Ensure the system is compatible and that all connections are secure. If sensors aren’t pairing, confirm they are within range and haven’t already been assigned to another system.

Incorrect temperature readings often stem from improper sensor placement – avoid direct sunlight or drafts. Consult the installation manual’s troubleshooting section for specific error codes and their corresponding solutions. If problems persist, contacting a qualified HVAC technician is recommended to diagnose and resolve complex issues safely and effectively.
Understanding Error Codes
Carrier Infinity thermostats utilize error codes to diagnose system malfunctions. These codes, displayed on the thermostat screen, provide valuable clues for troubleshooting. A “W” code often indicates a wiring issue with the heating system, while an “Y” code points to problems with the cooling system. Codes related to sensor failures, like “S1” or “S2”, suggest a faulty or disconnected smart sensor.
The installation manual contains a comprehensive list of error codes and their meanings. Referencing this list is crucial for accurate diagnosis. Some codes may indicate low voltage, requiring a check of the power supply. Others might signal communication errors between the thermostat and the HVAC equipment.
Don’t attempt repairs based solely on error codes; always verify the issue with a thorough system inspection. If you’re unsure about interpreting a code or resolving the problem, consult a qualified HVAC technician for assistance. Ignoring error codes can lead to further damage or system inefficiency.
Carrier Infinity System Overview
The Carrier Infinity system represents a pinnacle of home comfort technology, integrating seamlessly with the Infinity Touch Control thermostat. This system isn’t merely a temperature regulator; it’s a comprehensive climate control solution designed for optimal efficiency and personalized comfort. It combines advanced sensors, intelligent algorithms, and variable-speed components to deliver precise heating and cooling.
Key features include zoning capabilities, allowing independent temperature control in different areas of the home. Smart sensors monitor humidity and temperature, adjusting system operation for consistent comfort. The system prioritizes energy savings through variable-speed technology, adapting output to meet demand rather than operating at full capacity.
Installation requires careful attention to wiring and system commissioning. Detailed instructions are provided in the accompanying manual, covering everything from pre-installation checks to advanced feature configuration. Understanding the system’s interconnectedness is vital for successful installation and optimal performance.